Create a Responsive Contact Form using React.js and Email.js

I am a Blockchain and MERN stack developer. While building real-life application based full-stack projects, I also like to connect and network with different types of people to learn more from them.
Introduction-
Greetings, readers! Welcome to a comprehensive guide on creating responsive contact sections that seamlessly dispatch user messages and content from your website's contact forms. In this tutorial, we'll deep dive into the process of setting up and utilizing the Email.js service within your React JS application. By the end of this guide, you'll have the skill to seamlessly integrate a feature-rich contact form on your website that efficiently forwards user-submitted details to your email inbox.
In the digital world, contact sections on websites play a vital role in facilitating effortless communication between site visitors and owners. These sections prominently feature a 'send' button, allowing visitors to input their essential details such as email addresses, phone numbers, and messages. With a simple click of the 'send' button, all these details are seamlessly transmitted to the owner's designated email address.
If you want such a dynamic feature on your website, you're in the right place. This guide will walk you through the step-by-step process of harnessing the power of Email.js to achieve this functionality seamlessly.
Prerequisite-
Assuming you have a foundational understanding of React.js and have basic experience working with JavaScript-based forms, you're good to move forward on this tutorial.
Getting Started-
Our chosen tool for this tutorial is Email.js, a powerful service that streamlines the process of sending emails from client-side JavaScript. To move ahead, follow these preliminary steps:
Create an Account: Begin by visiting the Email.js website and creating an account.
Adding a Service: After creating an account click on Add New Service. Opt for the Gmail service, as per our needs.
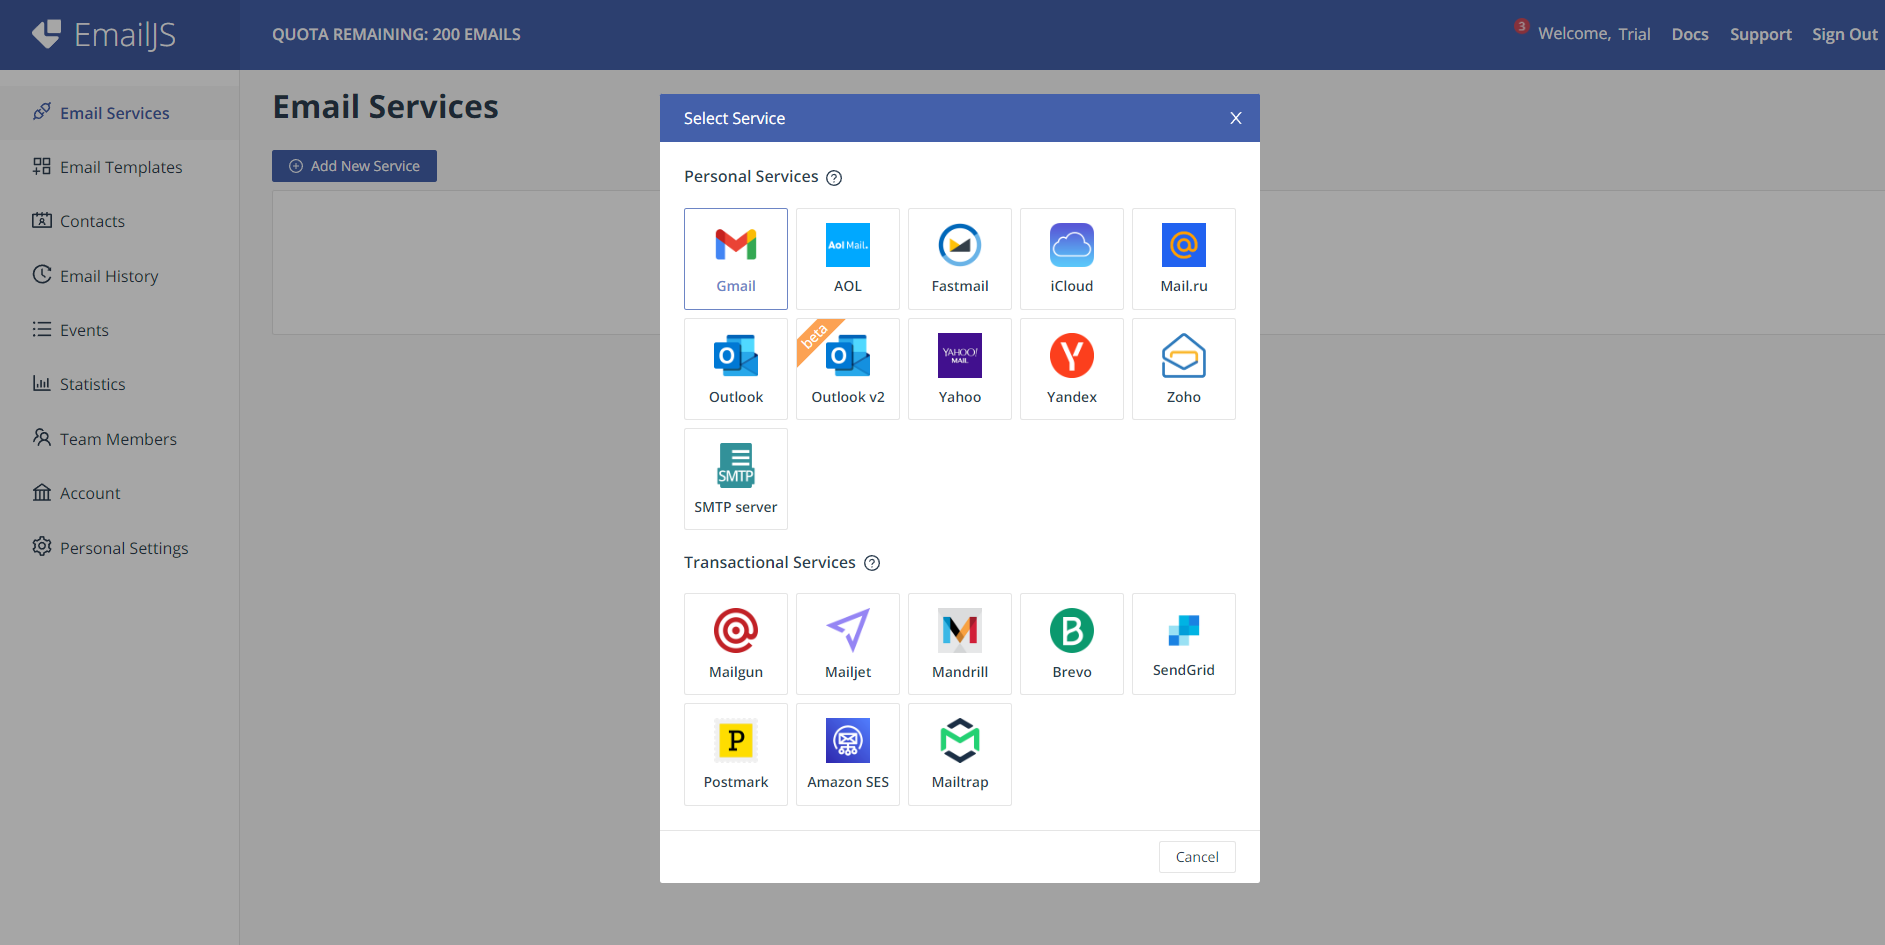
- Configuring the Service: Assign a project name and specify the email address where you wish to receive user-generated content from your contact form.
Creating a Template-
In this step, we will create an email template that aligns our requirements.
- Creating a Template: Initiate the creation of a new template. Customize the template by specifying the subject you desire for your received emails.
It will look like this -
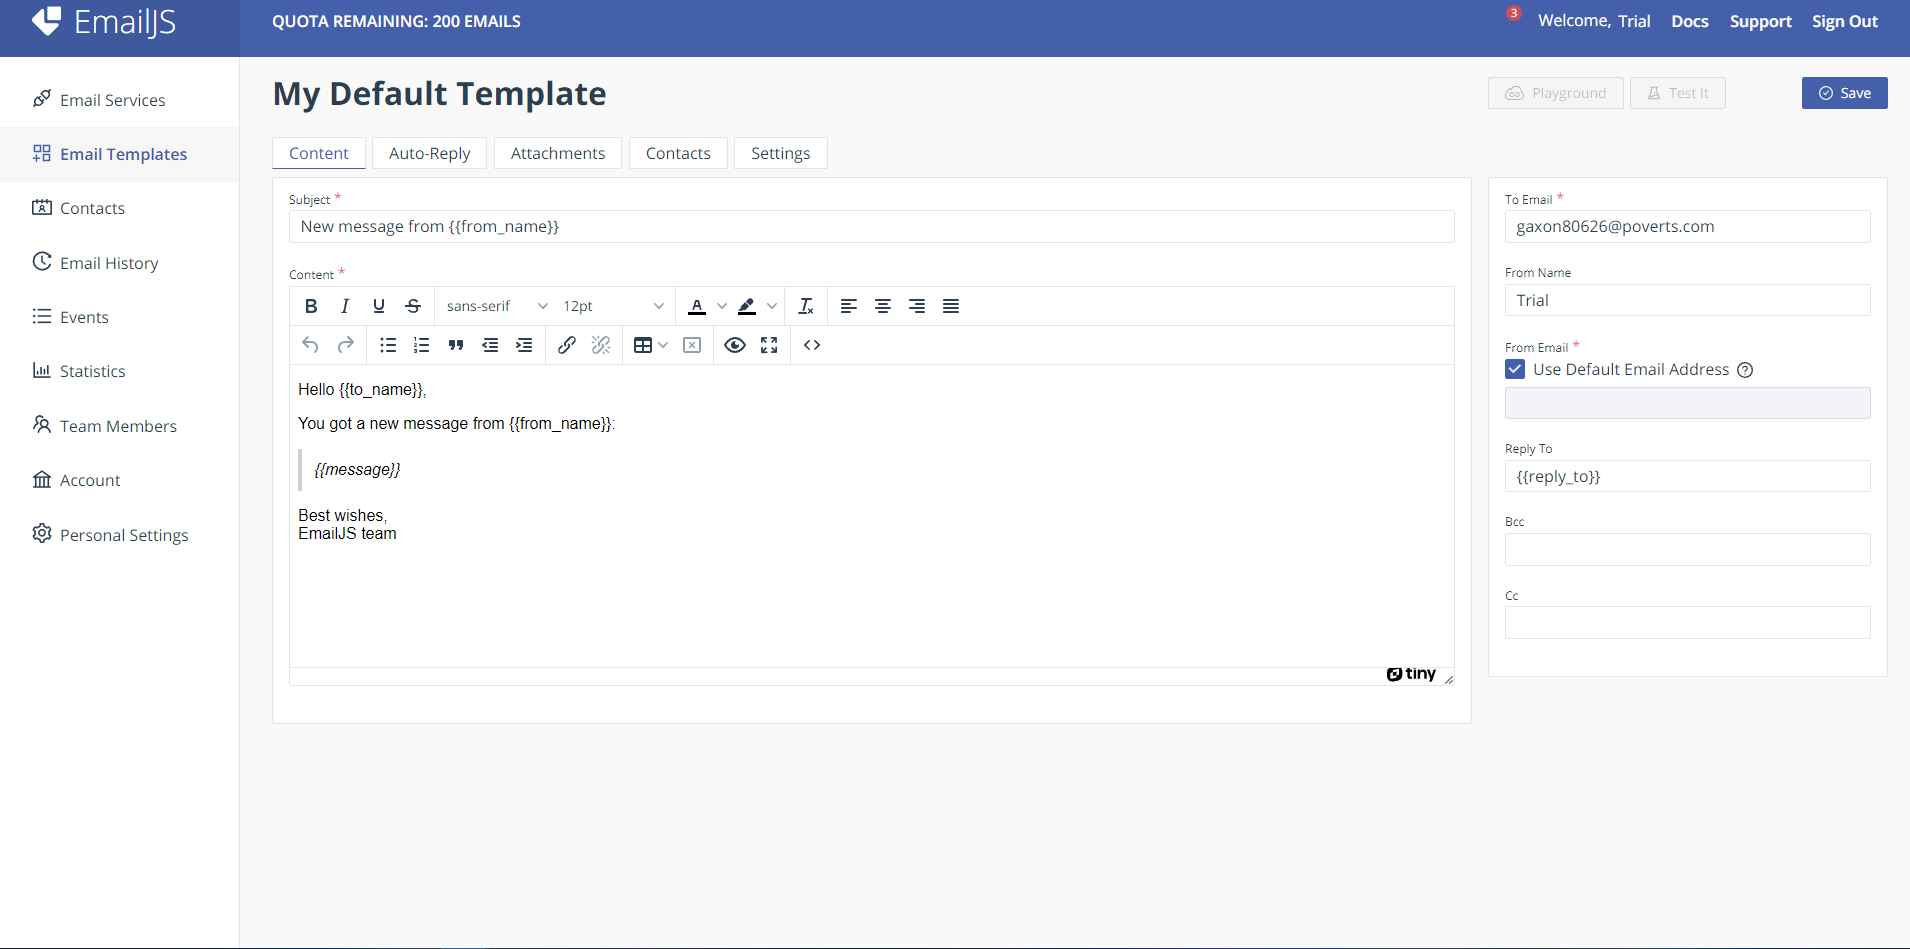
Defining Recipient: Designate the recipient's email address to which the content will be dispatched. Save the template after setting these parameters.
Testing the Template: Validate your configuration by clicking on the 'Test It' button. This sends a test email to your designated address, ensuring your setup is operational.
Form Creation-
Now that we're ready to use the features of Email.js within our React component, let's seamlessly integrate it into our contact form. Follow these straightforward steps to implement the integration:
- Just create a basic form and follow the following code-
In Terminal run npm install @emailjs/browser --save
import React, { useRef } from 'react';
import emailjs from '@emailjs/browser';

export const ContactUs = () => {
  const form = useRef();

  const sendEmail = (e) => {
    e.preventDefault();

    emailjs.sendForm('YOUR_SERVICE_ID', 'YOUR_TEMPLATE_ID', form.current, 'YOUR_PUBLIC_KEY')
      .then((result) => {
          console.log(result.text);
      }, (error) => {
          console.log(error.text);
      });
  };

  return (
    <form ref={form} onSubmit={sendEmail}>
      <label>Name</label>
      <input type="text" name="from_name" />
      <label>Email</label>
      <input type="email" name="user_email" />
      <label>Message</label>
      <textarea name="message" />
      <input type="submit" value="Send" />
    </form>
  );
};
- Service and Template IDs: Retrieve your Service ID, Template ID, and Public Key Account details from your Email.js account. You can find the Service ID under Email Services > Your Template, the Template ID under Email Templates > Settings, and the Public Key under your Account settings.
Custom Form Management-
While the previous section covered a basic form integration with Email.js, you might have more specific requirements, such as additional input fields in your forms. To address this, follow these steps to customize your form:
- Integrate New Inputs: Incorporate additional input fields within your form to fulfil your needs. For instance, to add a phone number input, refer to the following code snippet:
import React, { useRef } from 'react';
import emailjs from '@emailjs/browser';

export const ContactUs = () => {
  const form = useRef();

  const sendEmail = (e) => {
    e.preventDefault();

    emailjs.sendForm('YOUR_SERVICE_ID', 'YOUR_TEMPLATE_ID', form.current, 'YOUR_PUBLIC_KEY')
      .then((result) => {
          console.log(result.text);
      }, (error) => {
          console.log(error.text);
      });
  };

  return (
     return (
    <form ref={form} onSubmit={sendEmail}>
      <label>Name</label>
      <input type="text" name="from_name" />
      <label>Email</label>
      <input type="email" name="user_email" />
      <label>Phone No</label> {/* Adding a phone input here */}
      <input type="tel" name="user_number" />
{/* check the name tag, it will help us in creating additional input.*/}
      <label>Message</label>
      <textarea name="message" />
      <input type="submit" value="Send" />
    </form>
  );
  );
};
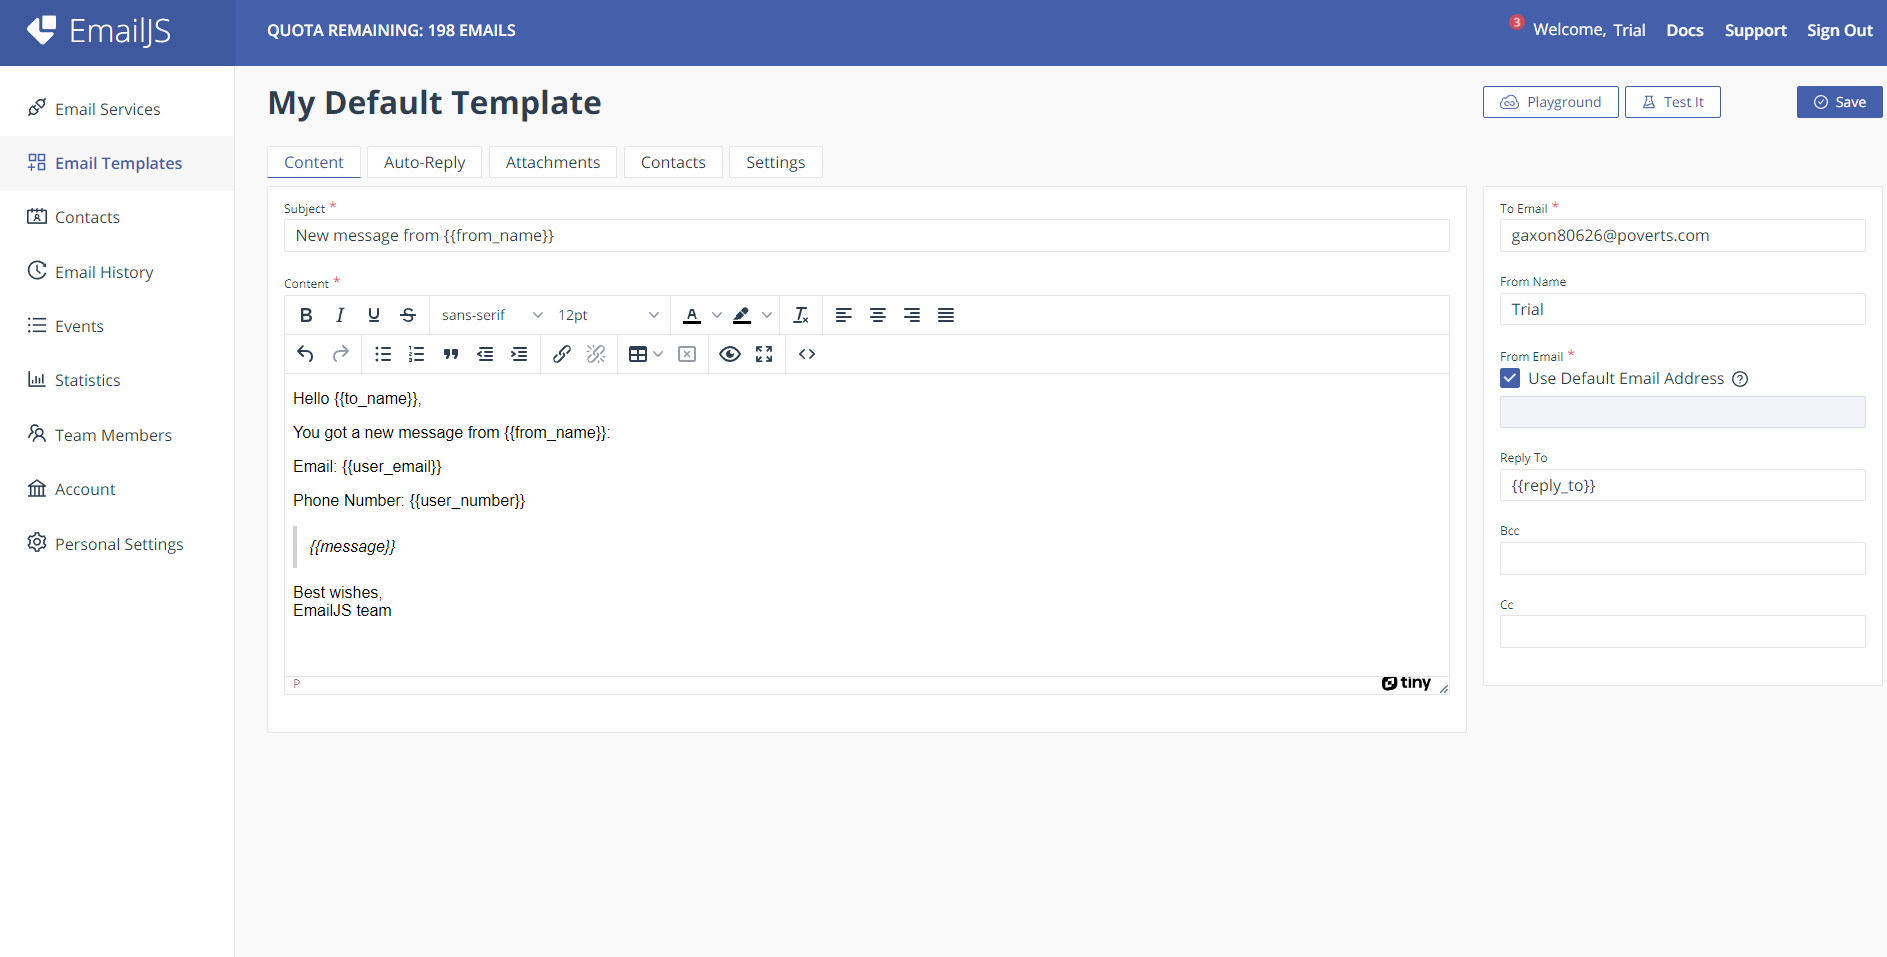
Email Template Adjustment: Head to the Email Templates section in your Email.js dashboard. Modify your email template to add the new input data. For example, you can add the following line in your template:
Phone Number: {{user_number}}Now your template would look like this-
By using the name attribute you assigned to the input field (e.g., "user_number"), you can dynamically inject the entered phone number into your email template. This ensures that the content from the form fields is seamlessly integrated into the outgoing email.
With this approach, you can effortlessly expand your form's capabilities by integrating as many fields as you need. Each new input requires a name attribute and a corresponding template adjustment.
Summary-
In conclusion, the integration of React and Email.js empowers your web presence with dynamic and responsive contact forms. By seamlessly integrating Email.js services into your React application, you unlock a streamlined channel for transmitting data. From fundamental setup to customization, this guide has equipped you to effortlessly manage diverse form inputs and email templates. As you expand your site's capabilities, you open new methods of interaction for users. Implement this knowledge to enhance your communication efficiency and elevate the overall user experience on your website.
Cheers & Happy Coding!


